With the holiday season approaching, you may start to think about decorating your house. How about a simple, rustic, and artistic Christmas tree? If you are keen to try this, here is our guide on making a driftwood Christmas tree.
Start by preparing the tools and equipment needed before looking for driftwood pieces. Then clean and sort the driftwood out by length. Drill a hole at the center of each stick, and then stack them with a wood dowel as the spine. Turn the sticks randomly, and you get a Christmas tree.
This article describes how you can easily turn some driftwood sticks into a beautiful, rustic Christmas tree. We also discuss why you want to consider this over the usual Christmas tree.
Why Make A Driftwood Christmas Tree?
It would help if you made a driftwood Christmas tree because it is a cost-effective way to get one ready. It is also better for the environment since you are not causing trees to be chopped. A driftwood Christmas tree is a fun art project and looks different, simple, and rustic.
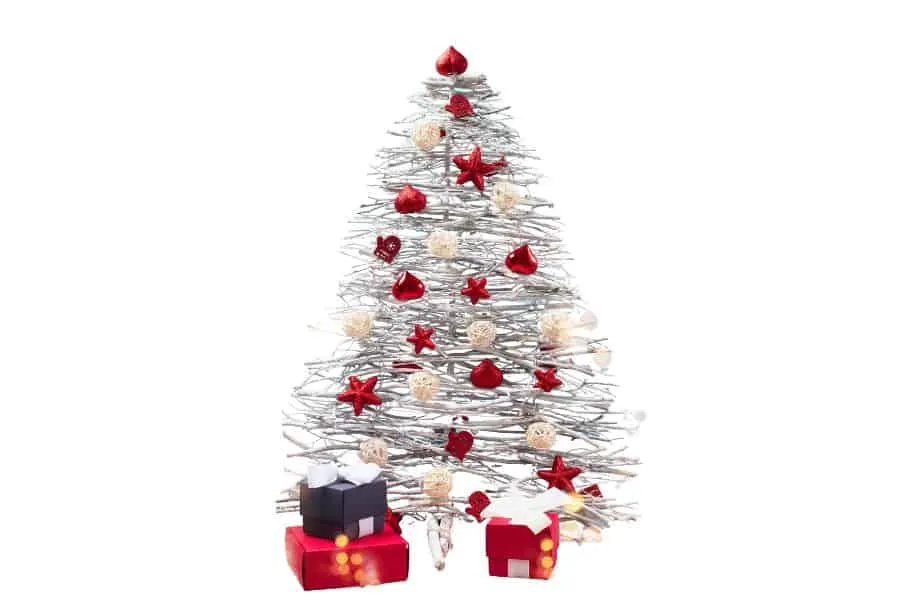
Generally, when it comes to Christmas trees, people usually get a real Christmas tree and then decorate it. However, more and more are resorting to plastic Christmas trees from Walmart to save costs or to keep reusing them for the next holiday.
However, a driftwood Christmas tree is another option you can consider for many reasons.
Fun Art Project: A driftwood Christmas tree is a simple yet fun project. You can spend countless fun hours doing the project with your children or any young ones around the house.
Better For The Environment: By repurposing driftwood, you use what many people may consider junk. You also do not buy chopped trees, meaning you avoid unnecessary cutting of trees, only to be used for decorative purposes.
By using driftwood Christmas trees, you also avoid supporting plastic Christmas trees, which we know may not be the best use of plastics. This means a driftwood Christmas tree is good for the environment in many ways.
A Different Tree Design: Christmas trees can be boring. People spend hours making, decorating, and designing the trees, but they look similar. Plus, not all of us have that much time anyway.
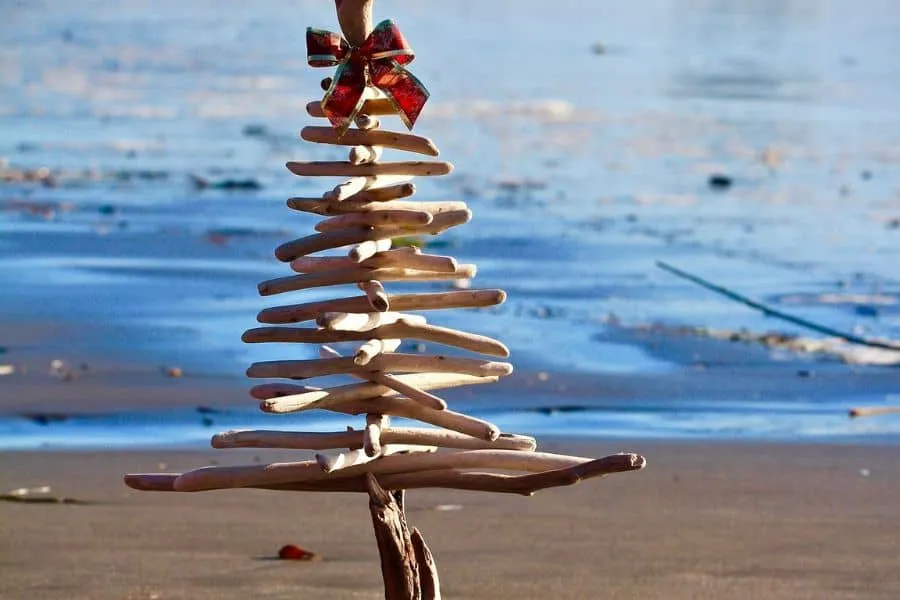
A driftwood Christmas tree is simple, rustic, and easy to make. You also get a very different Christmas tree that will keep conversations going during the holiday season.
Cost Effective: You may not have to purchase anything to make a driftwood Christmas tree. Driftwood pieces can easily be picked up at the beach, and the tools needed should just be lying about in your garage. You also may not need to purchase trinkets to hang on your tree, as the rustic look is interesting enough.
The driftwood Christmas tree could also be flattened by turning all the driftwood at the same angle. The tree can be stored easily and reused the next holiday season. More savings for you.
See the Best Driftwood Christmas Trees for 2022 in this article.
How To Make A Driftwood Christmas Tree
There are four steps to making a Christmas tree. You gather the tools before looking for driftwood sticks of different lengths. Then you clean and sort the driftwood before drilling holes in the center of the sticks and stacking them through a bar. You then turn the sticks randomly to create the Christmas tree.
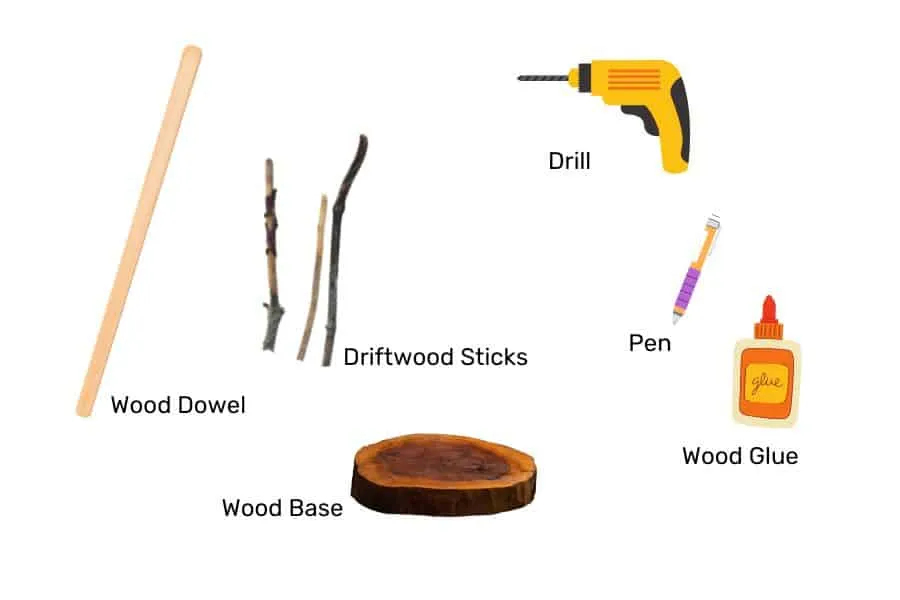
Step 1: Gather The Tools
To make a Christmas tree, you need the following:
- 30 pieces of driftwood sticks. They are best in different lengths, but if you cannot find them, you can cut them up later. If you want a taller tree, get more sticks.
- 1 wood dowel, around ⅜ inch (~1cm) in diameter. This will be the central spine of your tree. The taller you want your tree to be, the longer this dowel needs to be. If you do not have a wood dowel, you can use a steel rebar or a shower curtain stick. You could do it with a metal rod too.
- 1 wood base. This will be the base for your tree. The taller you want your tree, the larger the base needs to be.
- Wood glue.
- A pen to mark the central position of a driftwood stick before you drill it.
- Drill. Your drill bit’s diameter should be as big as the dowel’s diameter. This allows you to drill a hole in the driftwood to fit into the dowel.
- A decorative finisher for the tree. A common red star may work, but we recommend a starfish for the whole beach vibe.
Once you have collected everything, you can collect some driftwood.
Step 2: Get Some Driftwood
The next step is to go find some driftwood. Depending on your preference and time, you can do this in several ways:
Purchase Them: This is for those who want to easily get driftwood without spending hours combing the beach. You can purchase driftwood in many places as well. As a start, visit the nearby flea market and see if anyone is selling driftwood pieces. Chances are you may encounter at least one.
The other option is to go online. You can buy driftwood pieces from Amazon, Etsy, and eBay sellers. The key is to spend time and shop for the driftwood that suits your taste, length, and style.
For example, some like paler driftwood, while some like darker ones. Some like straighter driftwood pieces, while others like more natural, curvy types.
Source For Driftwood Yourself: If you are the type that enjoys hunting, consider taking this route. Drive yourself to the nearby beach, river, or creek. Bring along your children if you have any. Walk around and pick up driftwood that you think fits.
Look for straighter pieces of driftwood of different lengths if you can. This will help your tree to look more natural and nice. Also, if you are at the beach, consider picking up a starfish or two for the top of the Christmas tree later.
When picking driftwood, check with the local authorities whether you are allowed to do so. This is because you will pick up a lot of driftwood, which may be considered for commercial use in some jurisdictions. For commercial use of driftwood, you may need a permit.
Step 3: Clean And Sort Driftwood
Now that you have your driftwood, you will clean the wood and sort it out by length.
Cleaning the wood helps to ensure there is no debris on the wood that may fall off and dirty your floor later. At the most basic, consider removing any dead, loose bark from the driftwood and then brush away any remaining debris with a brush.
If you want to go all out to clean the wood, consider boiling the driftwood pieces and then soaking them in a bleach solution. Then sundry the wood pieces. The goal is to remove and kill any remaining microorganisms or fungi inside the wood pieces. This prevents your wood from turning white or black later.
For a full guide on how to treat and preserve driftwood, check out our guide here.
After cleaning the wood, sort the wood from the shortest to the longest. The idea is to decide which wood piece goes into the dowel first. The longest will go in first, with the shortest go in last.
This ensures the tree has a conical look, which looks more like a Christmas tree.
Step 4: Prepare The Base
The tree base serves as a platform to hold the dowel, which will, in turn, hold the driftwood sticks. To prepare the base:
- Mark the center of the wood base with a marker pen.
- You can drill through the wood or drill ¾ through. The deeper the hole, the more parts of the wood dowel you can push in. This means the whole tree will be more stable.
- Once drilled through, clean the whole with a brush or compressed air.
- Fill the hole with wood glue, and push in the wood dowel. As you push in, twist the dowel to ensure a tight fit.
- Wipe away any excess glue with a paper towel, and allow it to dry and harden.
Once the base is ready, you are not good at arranging and stacking driftwood through the dowel, making your Christmas tree.
Step 4: Drill And Arrange
These steps include drilling holes through the driftwood sticks and stacking them over the wood dowel.
- Mark the central position of the longest driftwood stick with a marker pen.
- Line up your drill with the mark, and drill a hole.
- After you drill the hole, clean the area with a brush, or use compressed air.
- Take your driftwood piece, and push it through the wood dowel.
- Continue steps 1-4 until all driftwood pieces are stacked inside. Remember to start with the longest stick, and end with the shortest.
Step 5: Voila
The final step is to balance the tree and add finishing touches. This completes the tree and prepares it to wow friends and family who visit your place.
- Turn the sticks randomly and at different angles. Experiment until you can get an impression of a conical tree.
- As you do so, ensure that the tree is balanced overall.
- If there are excess wood dowels not filled up by driftwood pieces, you can see them off now.
- When you are done, please take out a starfish, and glue it to the top of the wood for a rustic, beach-themed finish.